2/10/10
The only thing good about taking apart what I’ve already built, is putting the parts back together permanently. I’ve always liked assembling parts, I’d do great at a job in a department store, assembling displays, of course I may be a bit overqualified by the time this website is complete.
Gluing on the skins with randy went perfect, the aluminum gives the wall a sense of completion & solidity. We let them sit flat all weekend so the degaseal 2000 glue would dry. Monday morning I picked them up & let them sit in my shop all week, as the glue takes 14 days to full cure. the baggage compartment doors arrived from interstate metals in Milwaukie OR. The doors all looked good (I got double wall doors, so contents banging around inside don’t dent the doors from within) the frames however were a little off square. I’ve already figured out how to make a jig to straighten them out next week. This weekend will start a growth spurt that will make a lot of visual progress.
2/16/10
This past weekend, sausage & I permanently attached the wall panels, spare & fuel can holders & rear upper bar. Everything bolted together with locktight thread lock, glued & sealed with degabond 54. Assembly went perfect, no unforseen hangups, & I made sure to apply enough degabond such that when the parts were pushed together, some squeezed out along the whole length of the seam. I left this splooge untouched so I can cleanly cut it out when dry. After a couple days I can clearly say that degabond 54 is by far the best caulking/sealer I’ve ever worked with, & I’ve worked with silicone, acrylic, vulkem, siliconized acrylic, you name it, this stuff dries to a hard smooth rubbery finish perfect for painting, high tensile strength, & seems to bond to everything, skin included.
The jury is still out on the degaseal, as it still wasn’t dry as of this weekend. the edges are dry, but as we bolted parts to the wall panels, wet glue still oozed out of the edges. I’m not sure how it’s supposed to dry sandwiched in between fiberglass & aluminum, but the sales rep says to wait a couple more weeks till full cure. fortunately with the edges all dry, there’s no movement at all, so I’m still confident.
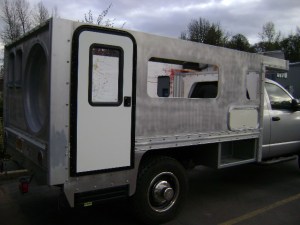
I had to wait on installing the floor line trim on the passenger side as the entry door came in the wrong size, & since this trim dies into the flange on the door, I can’t determine its exact length yet. You’ll notice I stopped the aluminum under the floor line trim, primarily this was because 040 mil aluminum only comes in 48″ rolls. thicker mil comes wider, but thicker wasn’t necessary for a 100% glued on application. The cutout piece from under the cabover was used to become the piece below the trim at the back end of the camper.
I also mounted the locking fuel door, extended the fuel lines to the new fuel door location, installed the fuel line shield below, & bolted on a diagonal stabilizer bar to laterally support the rear wheel well area of the wall. The passenger side has the door & stepdown to laterally support that wall area.
Last week I came up with an absolutely brilliant design for the wall cap/roof/& vinyl sides detail. this design will enable me to put on or remove the vinyl sides at any time for repairs (easy access) self center the roof as it drops down, & even if there is a leak at the bottom connection point, or wind-driven rain while driving with the roof down, water will always drain down the exterior of the walls, & not inside. Right now I’m revising the way it’s put together, as no one will make a custom extrusion for 3- 14′ pieces. It will now be a several bent pieces of aluminum welded together to make the profile. I’ll show a detail of this soon.
2/19/10
wall cap radius corners design, cut out of solid aluminum
2/27 10
ken @ beast bumpers finished the rear bumper, it looks fantastic, ready for powder coating next week. This is a good opportunity to mention just how many skilled small businesses there are in my immediate area, this is probably true across america, everything I’ve had made so far for this project has come out exactly as I wanted, exactly as I designed. It amazes me how much skill is out there, & non of these businesses specialize in expedition vehicles, or anything similar, (neither do I!) you just have to be able to communicate properly what you need.
3/8/10
the bumper’s still being powder coated, so no new progress on that, but over the past week I finalized the wall cap design & got that going,designed the side storage compartment doors, built the basement, water tank storage area, installed the baggage compartment doors, & picked up & installed the entry door & floor line trim.
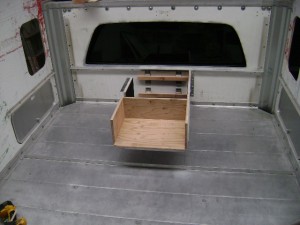
I designed the platform to allow access to the water tank should I ever have to replace it, & lined the sides, bottom & top with rubber to prevent sliding or bouncing in any direction, I then made wedges that slide across the front of the tank pushing it into the rear of the tank enclosure to hold things stable & tight. the two sides will be permanently mounted as there will be dressers above. I also painted the undersides & water tank enclosure sides white to reflect as much light as possible into the basement when the access doors are open.
the windows should be in any day now, & I’ve finally begun to design the lifting system.(I had a vague idea of what I was going to do, but the specifics alluded me)
after talking with marc from xp camper, who was kind enough to share some of his new lifting system details, I’ve chosen to go with hydraulics vs. electric actuators, vs. pneumatic cylinders. I first wanted pneumatic, because I already have on board air, but air is too fast & uneven to control, plus with this kind of system I couldn’t use the air to hold down the roof while driving (I’d need exterior clamps which I didn’t want for security reasons). actuators were my next impulse purely to avoid hydraulic fluid leaks, but I found the speed too slow, or the voltage too high (36 volt) for faster models. plus it’s impossible to assure the same speed between all four lifts. I’ve been talking with http://www.hypachydraulics.com about a bidirectional system (power up-power down) with solenoids to hold the load in both directions, this system wouldn’t offer a manual override as does marc’s @ xv camper, but it would offer everything else in a simple to use package. I really like the idea of a manual override, but I will have four batteries on board, if I can’t get any power whatsoever, I’ve got bigger problems! so I think I’m prioritizing, but anything can happen between now & then.
3/14/10
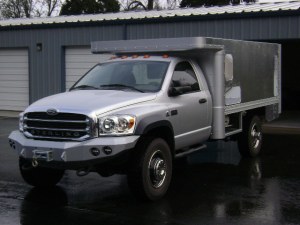
This past weekend I got the rear bumper & winch installed,wired the reverse lights, mounted the spare tire mounting plate, installed the pulley receivers, Bethany came by & helped me install all 3 windows, & installed the entry door stop/holder. I also had the tail pipe rerouted, as I had it cut several months ago because it exited the vehicle right where the steps are, so now it goes behind the steps, then turns & exist just to the rear of the steps. Jeremy @ goofy’s muffler in Glenwood did a great job not only rerouting the tail pipe, but also fabricating a new mount that bolts to the frame holding it all stable, & avoiding the potential motion of the pivot frame.
I also trimmed off all the caulk bead that splooged out from behind the floor line trim, now that it was dry, & trimmed some butyl that oozed out from behind the entry door installation. All four walls are now cleaned, lightly sanded, & ready for a future paint job. (that won’t happen for a while)
Bethany & I are off camping along the california coast for about 10 days, harvest valley specialties is off making the wall caps, radius wall cap pieces & lower storage compartment doors, all of which will go on, early April.


My Good Man – Steve – It appears you’re as careful
building this project as you were picking out a woman to marry! (I’m bias, but I think you did pretty good on the wife part.) May both continue to bring completeness to your life…for a lifetime.
By: wnr on March 15, 2010
at 11:59 pm